Pages

Showing posts with label Spectrum Noir. Show all posts

Wednesday, May 6, 2015

Mother's Day Card With Selective Masking!

Hello! I wanted to share a special card I made a few weeks ago while experimenting with my stamps. I love to try and find ways to stretch my stamps and this is one of my new favorites, so let's get right to it!
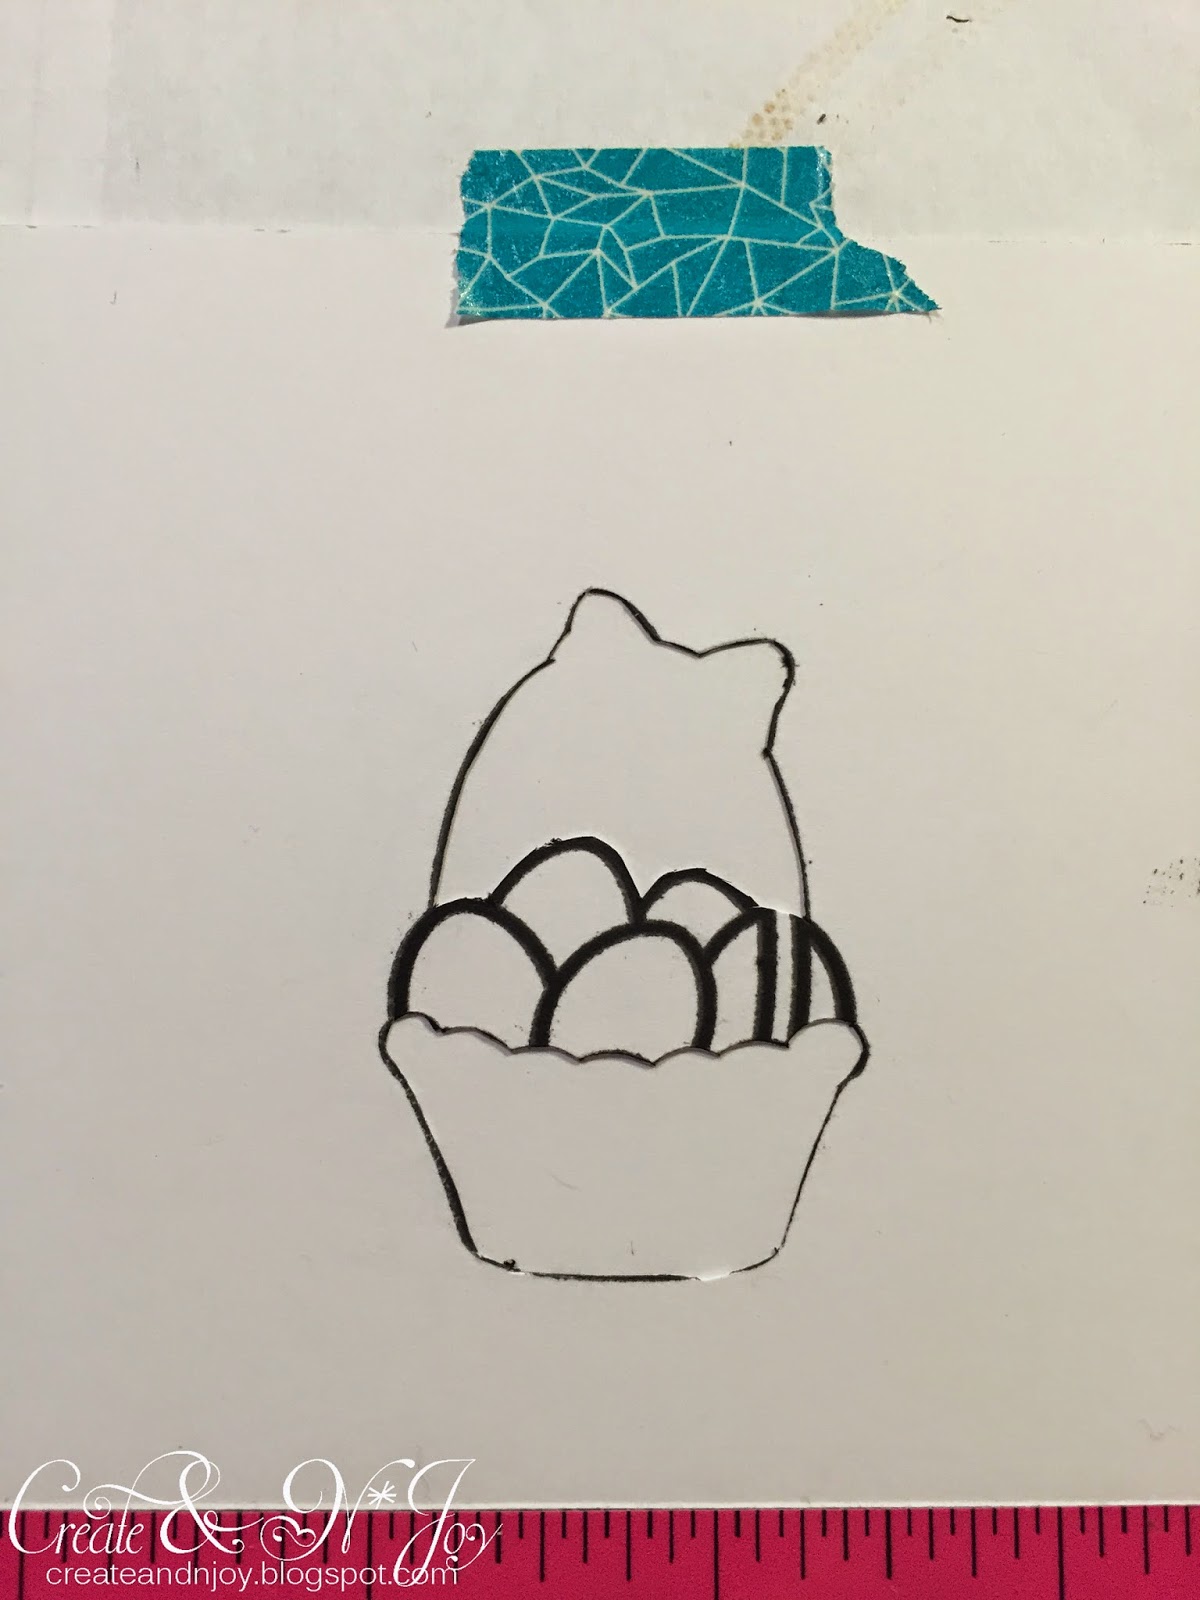
I brought out my super cute, Eggstra Special Easter stamps set from Lawn Fawn I stamped the basket with the eggs inside on some scrap paper, and then cut around the image leaving the eggs attached to create a mask. As you can see in the image below.
 I then cleaned my stamp, placed my card stock under the mask, and lined up my stamp with the mask. I did use my MISTI to get correct placement, but I'm sure you could easily do this using regular acrylic blocks.
 Using Memento Tuxedo Black Ink I stamped my image .
I removed my mask to reveal a cute, but very empty basket.

 I then created a mask just to cover the bottom of the basket, so I could begin stamping the flowers. Using the tulip from the same stamp set I added one at a time using masks to layer them.
 Yup, looks like a hot mess...as you can tell by my well loved basket mask, I made a few of these cards
 Then using my Spectrum Noir markers I colored the image.
 Using Tim Holtz Distess Ink in Mustard Seed and a circle cut from scrap paper I created the card base. I finished it up by using foam adhesive to attach the basket to the card, adding a bit of Wink of Stella clear to the bow, and stamping the sentiment using an old stamp I had in my stash.
 I really think this "new image" is very versatile and could be used for many occasions, such as birthdays, Get Well, Congrats, Happy Spring, You could even replace the flowers with other images like hearts, animals, tools, school supplies, baby items...you get the idea!
Don't be afraid to look at your stamps differently! The possibilities are endless! Thanks for joining me!
I would like to add this card to the following challenges:
Simon Says Stamp: Monday Challenge

Lawnscaping Challenge


Thursday, March 26, 2015

Monster Hugs and Catch Up!

Hello, All! I have been creating like mad in my little corner...sometimes I remember to take photos as I go and other times I get so caught up in the process of it all that it completely slips my mind! I've been trying to be better about it and now I have to play catch up here to get everything posted! So, without any more delay enjoy this very colorful post! 
I am going to use this card for the Simon Says Stamp Wednesday Challenge:Anything Goes
Wednesday Challenge

Originally I was going to use this card as an entry for the Distress Challenge for Lawnscaping, but I read about it a day too late. I like the card and had a blast creating it...I started with three Tim Holtz Alcohol Inks in Stream, Wild Plum, and Butterscotch. 

 Using some felt on a Tim Holtz applicator and a piece of plastic I had cut from some packaging, I applied the alcohol inks over the entire piece.
 I decided these monsters from Lawn Fawn's Monster Mash would be adorable in a tie-dye state. So, I used my StazOn Jet Black ink to stamp the little guys onto the opposite side of the plastic.
 I just love the way they turned out...they look like they're ready to have a good time!
 I fussy cut each critter out.
 Next up I decided that I wanted a little color in the background of my card, but knew to get the full effect of the alcohol inks the immediate background would need to be white, so I used Tim Holtz Distress Inks in Picked Raspberry, Mustard Seed, and Peacock Feathers to create this fabulous rainbow on the card base.
 I then temporarily placed my monsters where I wanted them to go along with Avery Elle's Avery's Alphas stamps to get placement just right.
 I used my wonderful new tool, the MISTI, to ensure perfect lettering.
 I finished the sentiment using the original stamp that came in the Monster Mash set. I then used my Spectrum Noir markers to create another rainbow effect in the lettering.
 I carefully used my Martha Stewart two way glue pen to place glue along the black stamped edge of each image. This is so the adhesive does not show through the clear plastic.
I added a little bit of glitter to the letters using my trusty Wink of Stella clear brush.
 and here is the final product.
 I hope you've enjoyed learning about the project! Feel free to comment or ask questions! Thanks for joining me! Keep an eye out for more posts very soon!


Thursday, December 4, 2014

'Tis the Season!!

Hello, Crafty friends...It has been far too long! Life kind of threw a few curves my way and so craftiness got set aside for a bit. But, I'm back and have a fun-tastic project to share with you! Since Christmas is just around the corner (I mean seriously?!? Where did this year go?!?) I thought I'd share this fabulous stamp set with you from Ellen Hutson Tis The Season! The sayings and images are delightful and so much fun to play with! (--A side note: I am beyond thrilled with this purchase from Ellen! The packaging that the stamp set comes in is a heavy duty plastic and it is already labeled on the top! I will absolutely be purchasing other items from Ellen in the future...I was thoroughly impressed!!!) I'll warn you...this post is a little picture heavy! I walk through how I created the fun "Ugly Christmas Sweater" card...(personally, if I could find the green sweater with Santa wearing sunglasses...I'd be all over it!) So, here you go...enjoy!
Tis the Season
 First, I used a bit of Post It tape to mask off the little tree on the sweater stamp.
 I inked up the stamp using Memento Tuxedo Black ink, then removed the bit of tape and stamped the image on a piece of white card stock.


 Next, I did a little selective inking of the Santa stamp and turned him at an angle on the sweater.

 I used my Spectrum Noir markers to do a bit of coloring and then cut out the image.

 I then masked the tree on the image again, in the same way as before, to stamp the sweater two more times onto my white panel for the front of my card. I used a bit of removable adhesive on the Santa sweater to get him placed properly so I could get the other sweaters stamped evenly.

 To get the words on the other two sweaters I did some more selective inking of the other sentiments in the same stamp set.
 I then colored the other sweaters.
 Added some dimensionals to the green sweater, used Wink of Stella (clear) on Santa's hat and stamped the main greeting on the card.

 I then rounded the bottom corners and added the panel to a simple red card. I love the finished result! I just makes me grin!

I would like to enter this card in the following challenges:
as well as 
Here are a few other projects (cards and gift tags) I made with this same set:
This design was inspired by Julie Ebersole


Friday, October 24, 2014

Second Lawnscaping Design Team Entry

The second card is a card that the idea came to me while reading the sentiments in the Let's Roll stamp set, and the idea made me chuckle... What would make a sushi lover happier than dancing sushi and soy sauce...and check out that chop stick as a cane. The card came together exactly as I had it pictured.

Lawnscaping Design Team Call Entries

Hello, All! I am doing something a little different for this post. The Lawnscaping Challenge blog I follow is hosting an open Design Team Call! Now, I've been using Lawn Fawn stamps for a while now and absolutely love the products! They always have amazingly adorable designed stamps and dies, and the quality is absolutely perfect! So, I was very excited to jump at the chance of joining a blog that encourages the use of such fantastic products, so, here goes... The first project I'd like to enter is one that I created for their pattern paper challenge earlier this month...I'm so proud of this card it just makes me grin!
The second card is a card that the idea came to me while reading the sentiments in the Let's Roll stamp set, and the idea made me chuckle... What would make a sushi lover happier than dancing sushi and soy sauce...and check out that chop stick as a cane. The card came together exactly as I had it pictured.
The last project is of my very first card in a box attempt. I love the result, but need to practice a bit taking photos of them. These photos don't quite do it justice, but they are what I could get at that moment...The first is more true to the colors, but the others I wanted to show off the Wink of Stella Glitter that adds such a fun element to the card.


Hope you enjoyed! Thanks for stopping by and take care!