Pages

Showing posts with label Masking. Show all posts

Wednesday, May 6, 2015

Mother's Day Card With Selective Masking!

Hello! I wanted to share a special card I made a few weeks ago while experimenting with my stamps. I love to try and find ways to stretch my stamps and this is one of my new favorites, so let's get right to it!
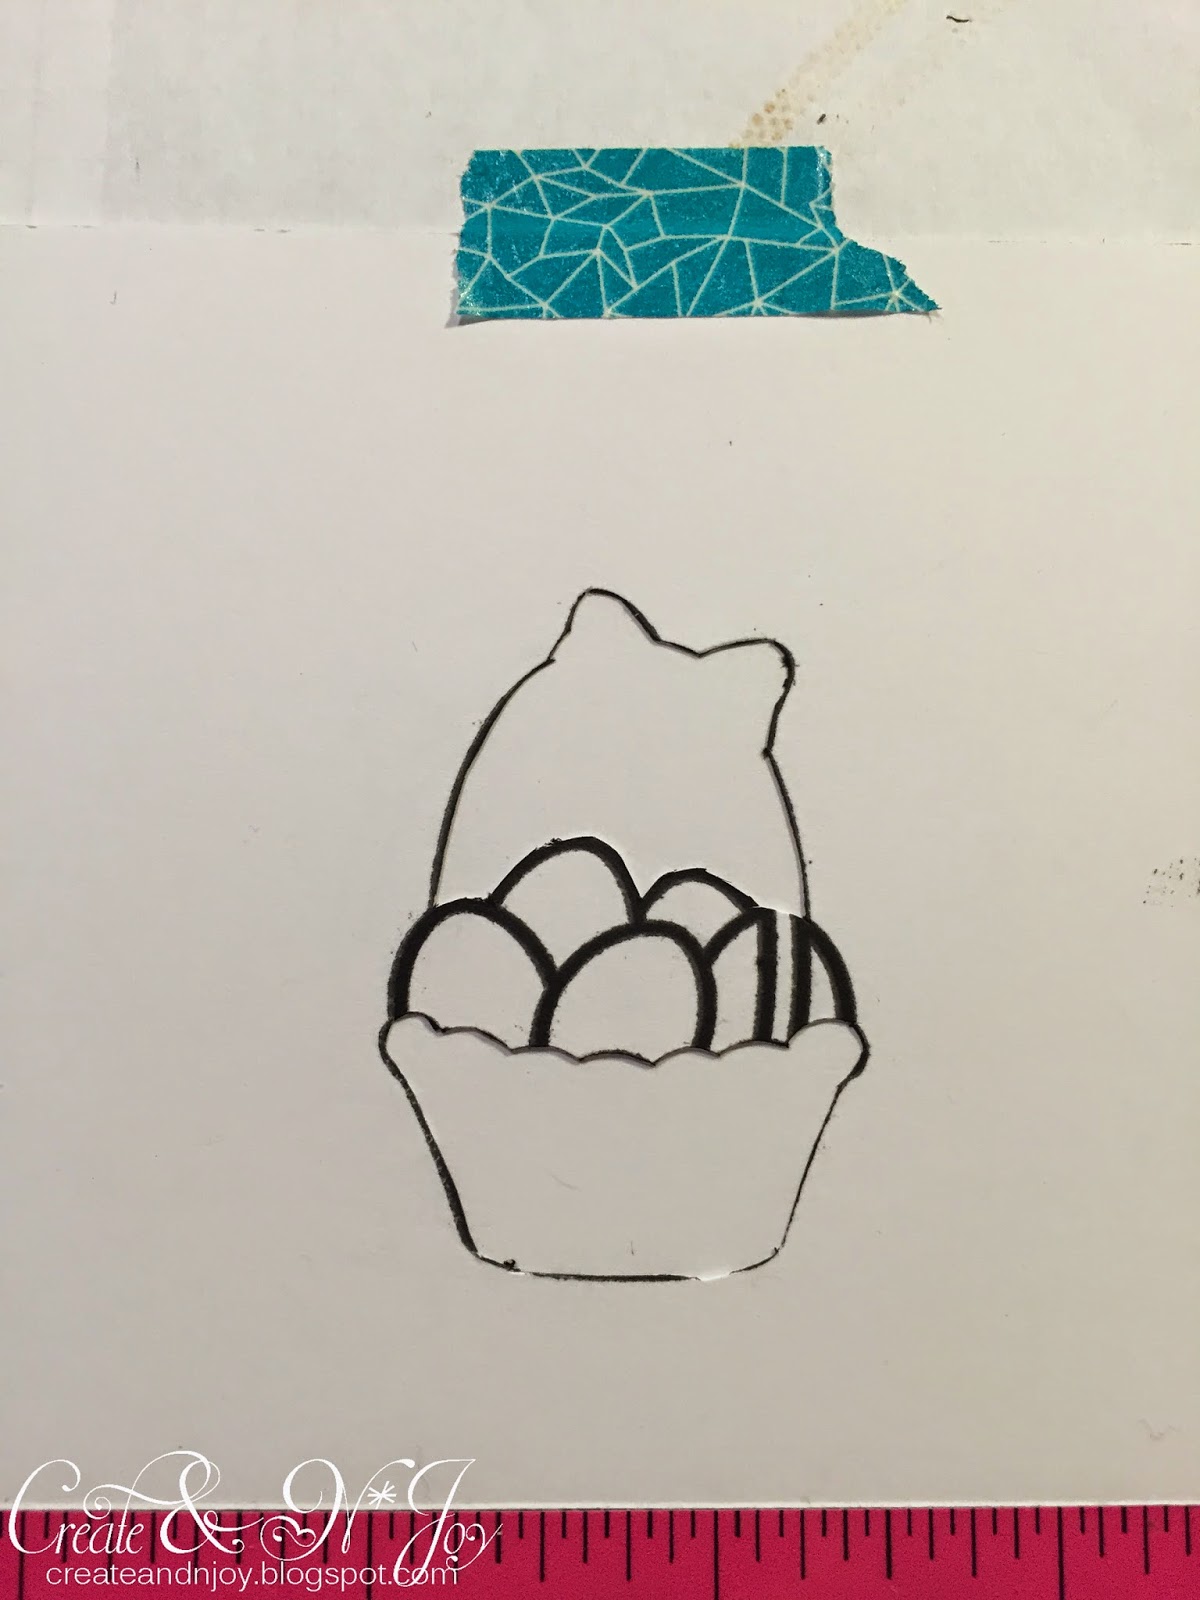
I brought out my super cute, Eggstra Special Easter stamps set from Lawn Fawn I stamped the basket with the eggs inside on some scrap paper, and then cut around the image leaving the eggs attached to create a mask. As you can see in the image below.
 I then cleaned my stamp, placed my card stock under the mask, and lined up my stamp with the mask. I did use my MISTI to get correct placement, but I'm sure you could easily do this using regular acrylic blocks.
 Using Memento Tuxedo Black Ink I stamped my image .
I removed my mask to reveal a cute, but very empty basket.

 I then created a mask just to cover the bottom of the basket, so I could begin stamping the flowers. Using the tulip from the same stamp set I added one at a time using masks to layer them.
 Yup, looks like a hot mess...as you can tell by my well loved basket mask, I made a few of these cards
 Then using my Spectrum Noir markers I colored the image.
 Using Tim Holtz Distess Ink in Mustard Seed and a circle cut from scrap paper I created the card base. I finished it up by using foam adhesive to attach the basket to the card, adding a bit of Wink of Stella clear to the bow, and stamping the sentiment using an old stamp I had in my stash.
 I really think this "new image" is very versatile and could be used for many occasions, such as birthdays, Get Well, Congrats, Happy Spring, You could even replace the flowers with other images like hearts, animals, tools, school supplies, baby items...you get the idea!
Don't be afraid to look at your stamps differently! The possibilities are endless! Thanks for joining me!
I would like to add this card to the following challenges:
Simon Says Stamp: Monday Challenge

Lawnscaping Challenge


Thursday, December 4, 2014

'Tis the Season!!

Hello, Crafty friends...It has been far too long! Life kind of threw a few curves my way and so craftiness got set aside for a bit. But, I'm back and have a fun-tastic project to share with you! Since Christmas is just around the corner (I mean seriously?!? Where did this year go?!?) I thought I'd share this fabulous stamp set with you from Ellen Hutson Tis The Season! The sayings and images are delightful and so much fun to play with! (--A side note: I am beyond thrilled with this purchase from Ellen! The packaging that the stamp set comes in is a heavy duty plastic and it is already labeled on the top! I will absolutely be purchasing other items from Ellen in the future...I was thoroughly impressed!!!) I'll warn you...this post is a little picture heavy! I walk through how I created the fun "Ugly Christmas Sweater" card...(personally, if I could find the green sweater with Santa wearing sunglasses...I'd be all over it!) So, here you go...enjoy!
Tis the Season
 First, I used a bit of Post It tape to mask off the little tree on the sweater stamp.
 I inked up the stamp using Memento Tuxedo Black ink, then removed the bit of tape and stamped the image on a piece of white card stock.


 Next, I did a little selective inking of the Santa stamp and turned him at an angle on the sweater.

 I used my Spectrum Noir markers to do a bit of coloring and then cut out the image.

 I then masked the tree on the image again, in the same way as before, to stamp the sweater two more times onto my white panel for the front of my card. I used a bit of removable adhesive on the Santa sweater to get him placed properly so I could get the other sweaters stamped evenly.

 To get the words on the other two sweaters I did some more selective inking of the other sentiments in the same stamp set.
 I then colored the other sweaters.
 Added some dimensionals to the green sweater, used Wink of Stella (clear) on Santa's hat and stamped the main greeting on the card.

 I then rounded the bottom corners and added the panel to a simple red card. I love the finished result! I just makes me grin!

I would like to enter this card in the following challenges:
as well as 
Here are a few other projects (cards and gift tags) I made with this same set:
This design was inspired by Julie Ebersole


Friday, August 22, 2014

A Little Play Goes A Long Way

Hello everyone, I wanted to share a card that was inspired by the 88th Lawnscaping Challenge! 

The theme is TEXTURE! Now, I've always been a little wary of using textures because I find that it can sometimes overtake the rest of what is happening on your project. So, I really wanted to try my hand at it and see what would happen...I started rummaging through my craft stash and came across jar of Deco Art Snow-Tex. I knew I had found my texture, but then I needed to decide...did I want to create a desert scene and use it as sand? Or design a house and use it as brick? That's when I saw my Love You S'more stamp set from Lawn Fawn and I knew I wanted textured bears! And yes, I wanted plural...so, I stamped Mr. Bear on white card stock in Black Soot distress ink, placed a clear stamping block behind it, held it to the light and traced the image so I could have the bears facing each other! (genius I know.)


 After I had multiple bears to play with I scooped a small amount of the Snow-Tex into my paint tray along with a few drops of tan acrylic paint and mixed them together. I used the tip of my finger to spread the mixture onto the stamped image. This did obscure the lines so after I dried it with my heat gun I drew over the image with a ball point pen. The dark brown bear (because he is facing the right direction) I simply restamped the him with the stamp again.
 To create my scene I used two old 'masks' I created from simple white card stock and washi tape. I used Mowed Lawn and Peeled Paint for the grass area.
 Then Tumbled Glass for the sky.
 Here is a photo of the card. I handwrote "Love bears all things" along the top of the grassy area. Added a little heart punch with some Glossy Accents on it.
 Here is a close up of my 'fuzzy' bears! I love them! So, in the end I'm very glad I played along and took a chance with texture!