Pages

Showing posts with label Wink of Stella. Show all posts

Thursday, March 26, 2015

Monster Hugs and Catch Up!

Hello, All! I have been creating like mad in my little corner...sometimes I remember to take photos as I go and other times I get so caught up in the process of it all that it completely slips my mind! I've been trying to be better about it and now I have to play catch up here to get everything posted! So, without any more delay enjoy this very colorful post! 
I am going to use this card for the Simon Says Stamp Wednesday Challenge:Anything Goes
Wednesday Challenge

Originally I was going to use this card as an entry for the Distress Challenge for Lawnscaping, but I read about it a day too late. I like the card and had a blast creating it...I started with three Tim Holtz Alcohol Inks in Stream, Wild Plum, and Butterscotch. 

 Using some felt on a Tim Holtz applicator and a piece of plastic I had cut from some packaging, I applied the alcohol inks over the entire piece.
 I decided these monsters from Lawn Fawn's Monster Mash would be adorable in a tie-dye state. So, I used my StazOn Jet Black ink to stamp the little guys onto the opposite side of the plastic.
 I just love the way they turned out...they look like they're ready to have a good time!
 I fussy cut each critter out.
 Next up I decided that I wanted a little color in the background of my card, but knew to get the full effect of the alcohol inks the immediate background would need to be white, so I used Tim Holtz Distress Inks in Picked Raspberry, Mustard Seed, and Peacock Feathers to create this fabulous rainbow on the card base.
 I then temporarily placed my monsters where I wanted them to go along with Avery Elle's Avery's Alphas stamps to get placement just right.
 I used my wonderful new tool, the MISTI, to ensure perfect lettering.
 I finished the sentiment using the original stamp that came in the Monster Mash set. I then used my Spectrum Noir markers to create another rainbow effect in the lettering.
 I carefully used my Martha Stewart two way glue pen to place glue along the black stamped edge of each image. This is so the adhesive does not show through the clear plastic.
I added a little bit of glitter to the letters using my trusty Wink of Stella clear brush.
 and here is the final product.
 I hope you've enjoyed learning about the project! Feel free to comment or ask questions! Thanks for joining me! Keep an eye out for more posts very soon!


Thursday, December 4, 2014

'Tis the Season!!

Hello, Crafty friends...It has been far too long! Life kind of threw a few curves my way and so craftiness got set aside for a bit. But, I'm back and have a fun-tastic project to share with you! Since Christmas is just around the corner (I mean seriously?!? Where did this year go?!?) I thought I'd share this fabulous stamp set with you from Ellen Hutson Tis The Season! The sayings and images are delightful and so much fun to play with! (--A side note: I am beyond thrilled with this purchase from Ellen! The packaging that the stamp set comes in is a heavy duty plastic and it is already labeled on the top! I will absolutely be purchasing other items from Ellen in the future...I was thoroughly impressed!!!) I'll warn you...this post is a little picture heavy! I walk through how I created the fun "Ugly Christmas Sweater" card...(personally, if I could find the green sweater with Santa wearing sunglasses...I'd be all over it!) So, here you go...enjoy!
Tis the Season
 First, I used a bit of Post It tape to mask off the little tree on the sweater stamp.
 I inked up the stamp using Memento Tuxedo Black ink, then removed the bit of tape and stamped the image on a piece of white card stock.


 Next, I did a little selective inking of the Santa stamp and turned him at an angle on the sweater.

 I used my Spectrum Noir markers to do a bit of coloring and then cut out the image.

 I then masked the tree on the image again, in the same way as before, to stamp the sweater two more times onto my white panel for the front of my card. I used a bit of removable adhesive on the Santa sweater to get him placed properly so I could get the other sweaters stamped evenly.

 To get the words on the other two sweaters I did some more selective inking of the other sentiments in the same stamp set.
 I then colored the other sweaters.
 Added some dimensionals to the green sweater, used Wink of Stella (clear) on Santa's hat and stamped the main greeting on the card.

 I then rounded the bottom corners and added the panel to a simple red card. I love the finished result! I just makes me grin!

I would like to enter this card in the following challenges:
as well as 
Here are a few other projects (cards and gift tags) I made with this same set:
This design was inspired by Julie Ebersole


Tuesday, October 7, 2014

A few cards and a Lawn Fawn Challenge

So, It's been a while! Lots going on for me right now and while I still try to find time to create I don't always find time to post. So, here is a post that will make up for my absence...Here are some cards I simply made for fun and at the end there is a card I'd like to enter into the Lawnscaping Challenge!
Here goes...
I used Tim Holtz Texture Paste for the first time and love it! I replaced my stencil with diagonal stripes after the paste dried and blended over it with Peacock Feathers, Picked Raspberry, and Mustard Seed distress inks. For the wonderful sentiment I used a stamp from Simon Says Stamp's Blessed set.
 This was a fun thank you card for my awesome dad who recently worked on my husband's brakes for us. I used the Lawn Fawn set, Let's Roll and colored it in with alcohol markers.
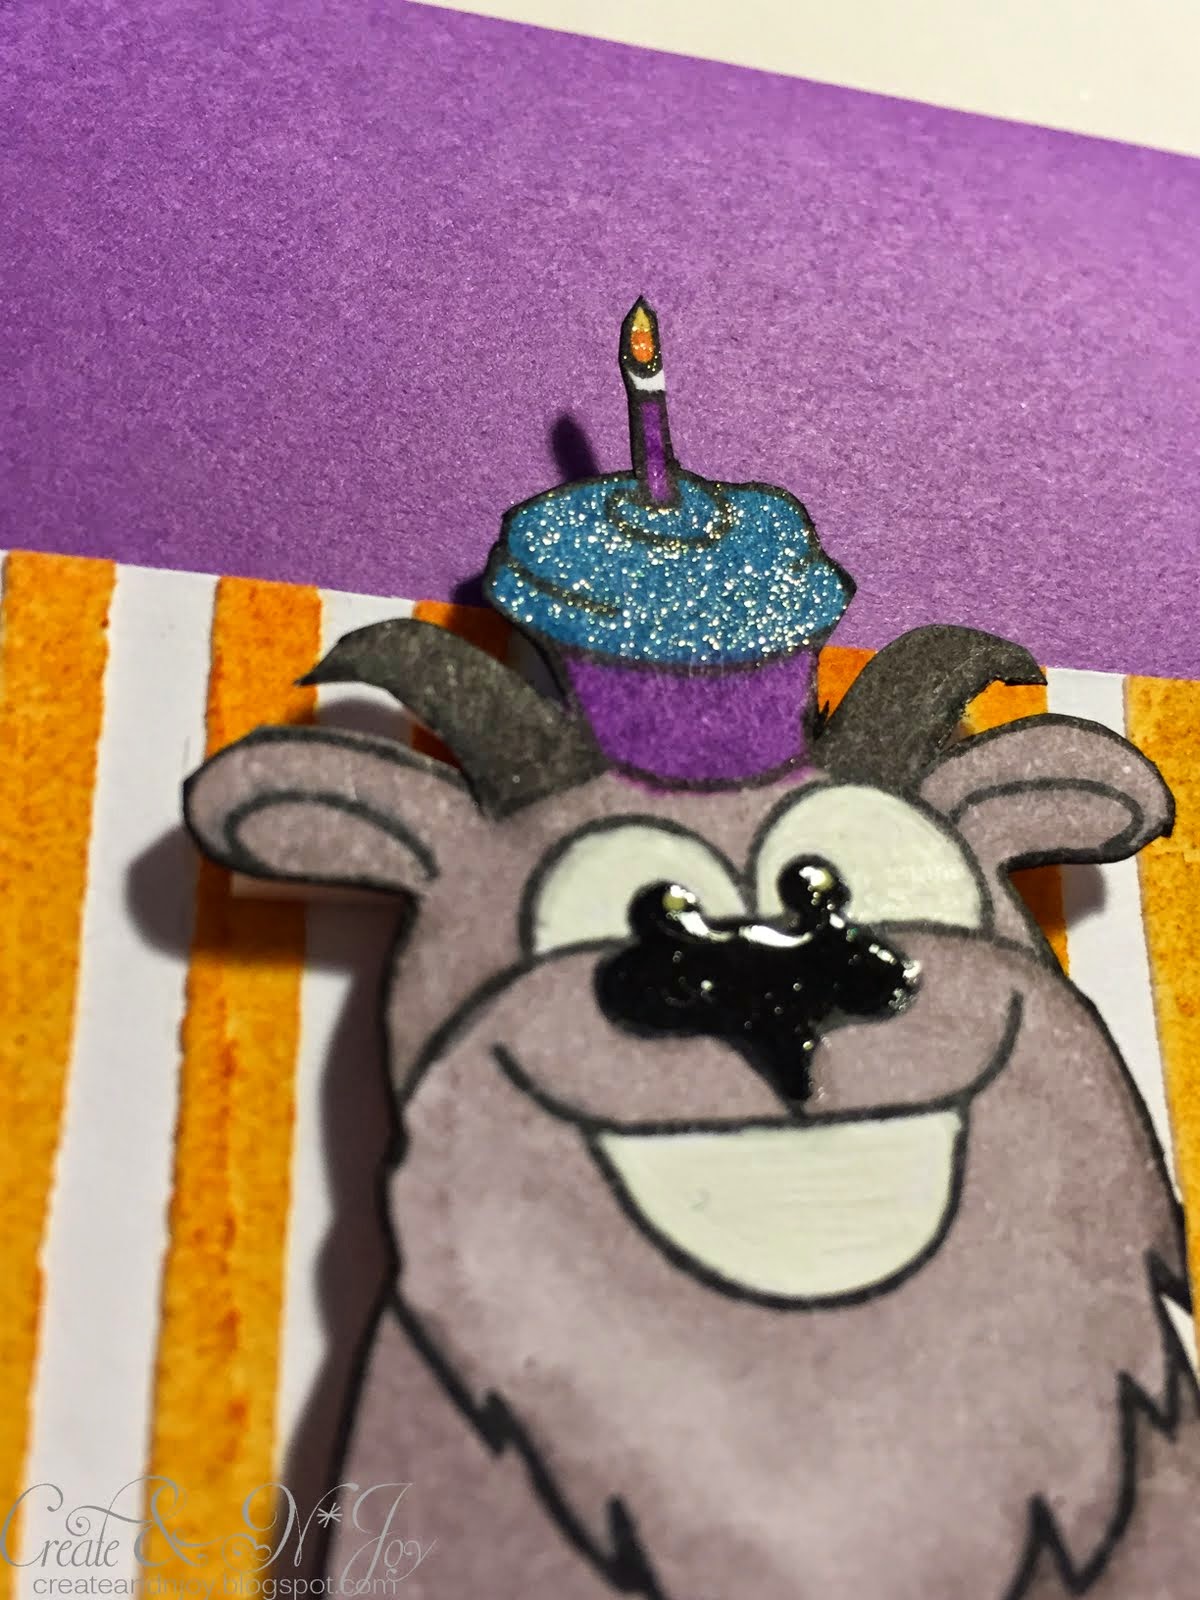
 For this happy card I used the Texture Paste again with Dusty Concord, Spiced Marmalade, and Peacock Feathers. I then stamped the goat from Simon Says Stamp's Birthday Farm Animals, and colored him using my new Spectrum Noir markers! I finished him off with a bit of Wink of Stella glitter on the cupcake and some white gel pen and Glossy Accents on his eyes and nose.
 Detail shot of the goat!
OK...here is the Lawn Fawn Challenge entry!
http://lawnscaping.blogspot.com/2014/10/lawnscaping-challenge-patterned-paper.html
I am so excited to share this next project with you! I'm so glad I joined this challenge because I love the way it turned out. The challenge is to use patterned paper...the instructions said you could also make your own...so, since I had never tried that I thought I would....

I started out by using my ruler and pencil to create a diamond pattern across the front of the card. Then I cut some Post It tape to use as a mask for the diamonds around the one I would be stamping in...and proceeded to stamp my little characters from Lawn Fawn's set Monster Mash!

 I then chose my second creature to use and began stamping him as well.
 Once all the stamping was finished the Spectrum Noir coloring began.....
 (yes, that little guy on the bottom of the card was intentionally stamped upside down.)
I used my ruler and white gel pen to create a more defined line to separate the blocks a little more. I think it gave it all such a nice finish!
 The cute sentiment is from the same stamp set. This card just makes me happy! It's going to be difficult to decide who gets to receive this one!